概述
- 使用 totp Time-Based One-Time Password 认证,基于软件 pam_google_authenticator 实现;
- 为 linux 的 ssh 和 sudo 开启 2fa two-factor authenticator;
安装软件
bash:~$ yum install -y pam_google_authenticator
or
bash:~$ sudo apt install -y libpam-google-authenticator
生成二次验证代码
- 下方命令会直接在终端生成一个二维码,可以直接使用手机客户端 Google 或者 Microsoft 的 Authenticator 扫码添加;
- 此命令默认会在用户的宿主目录生成文件 ~/.google_authenticator;
- 在上述文件内删除 “紧急备用码”,则自动生成的紧急备用码会失效(生产环境建议删除);
bash:~$ google-authenticator -t -f -d -w 3 -e 10 -r 3 -R 30

参数说明:
# -t: 使用 TOTP 验证
# -f: 默认将配置保存到 ~/.google_authenticator 文件里面
# -d: 不允许重复使用以前使用的令牌
# -w 3: 使用令牌进行身份验证以进行时钟偏移
# -e 10: 生成 10 个紧急备用代码
# -r 3 -R 30: 限速 - 每 30 秒允许 3 次登录
开启 ssh 2fa
配置 pam.d
- 配置 pam_google_authenticator 并禁用 common-auth(不禁用会要求先输入 Password,在输入Verification code):
bash:~$ sudo vim /etc/pam.d/sshd
# 添加以下行
auth required pam_google_authenticator.so
# @include common-auth
配置 sshd
- 使用密码登录,只配置
ChallengeResponseAuthentication即可;表示 RFC-4256 键盘交互式身份验证方案的支持; - 使用密钥登录,需要额外配置
PubkeyAuthentication和AuthenticationMethods; - 前提是已经配置了
UsePAM; - 另外,如果需要只针对 root 用户生效,只需将上述 3 个配置项写在对应用户的 Match 中即可;
bash:~$ sudo vim /etc/ssh/sshd_config

UsePAM yes
ChallengeResponseAuthentication yes
PubkeyAuthentication yes
AuthenticationMethods publickey,keyboard-interactive

# 只对 root 用户启用
Match User root
    ChallengeResponseAuthentication yes
    PubkeyAuthentication yes
    AuthenticationMethods publickey,keyboard-interactive
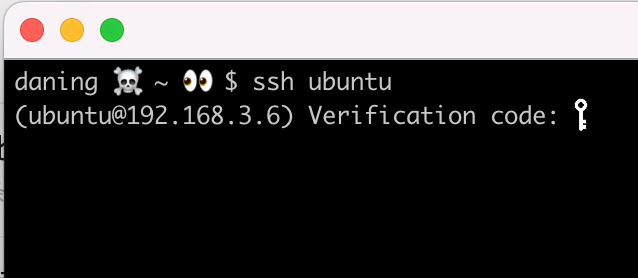
重启 sshd
bash:~$ sudo systemctl restart ssh.service
- 测试截图:
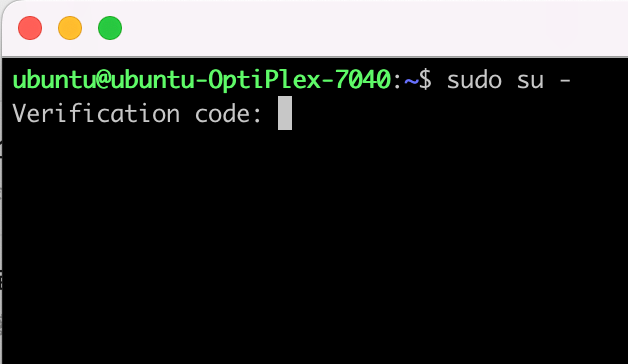
开启 sudo 2fa
# 配置 sudo 二次验证, 注释 common-auth
bash:~$ sudo vim /etc/pam.d/sudo

# @include common-auth
auth required pam_google_authenticator.so nullok
- 测试截图: